Introduction
One of my goals this year was to build a robot for a Robot Riot event, affectionately known as Chicago’s worst and only robot fighting league. Initially, going into building it, I had no clue what the theme would be but after building the chassis, attaching the motors, and then deciding to use a PS3 controller as my control device for the robot, the idea eventually came to me. At first, I thought of making a Minecraft bot but then I saw a Minecraft built Tesla’s Cybertruck and thought why not the Cybertruck!
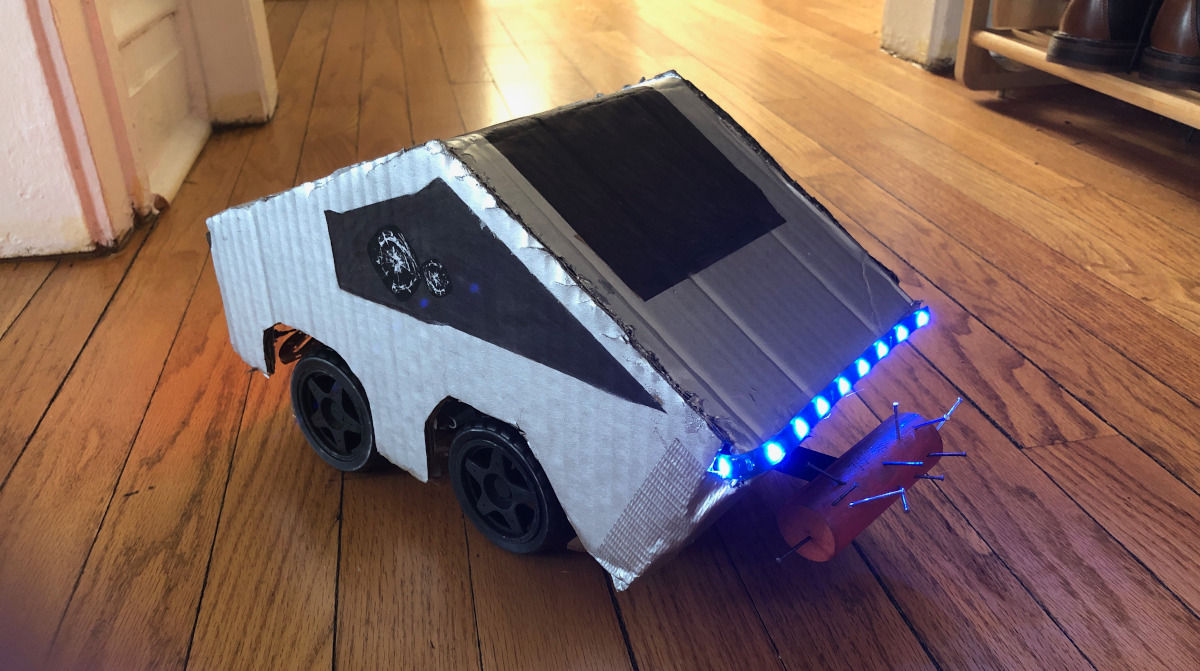
Sometime this year I will be presenting, The Revenge of the Cybertruck, at a Robot Riot competition. The proportions are off a little because of how close the wheels are on the chassis 🙃. But more or less, the resemblance is there. The idea is that after the abuse the Cybertruck endured during Elon Musk’s unveiling, it went rogue and took the sledgehammer used on it to create destruction.
I’m hopeful that it can last one round but if not, I’m happy that I was able to build it and I’ve learned so much about electronics, prototyping, and how to build a robot. Going into it, I wasn’t sure how it would turn out or if it would be something I would eventually stop building out of frustration but I stuck with it and persevered.
Building the Cybertruck
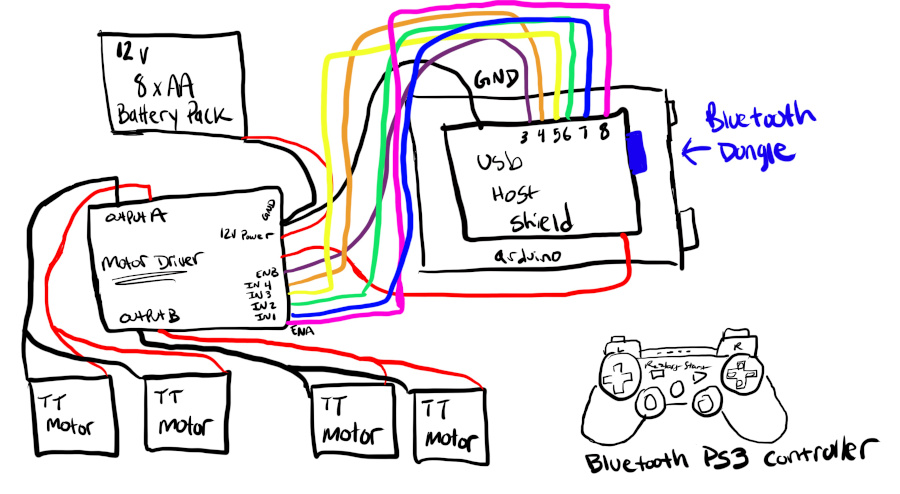
For the Chassis, I am using a kit I bought online, it came with 4 TT motors and 4 wheels for the motor as well. The microcontroller, the brain of the robot, is an Arduino Uno. It is powered by a 12V battery pack (8xAA batteries) and a motor driver (L298N). The 12V battery supply goes straight to the motor driver, which uses 7V of power and returns an output of 5V, this output then powers the Arduino. The motor driver is connected to the Arduino which controls the signals that are sent to the driver and thus the motors which are connected to the motor driver.
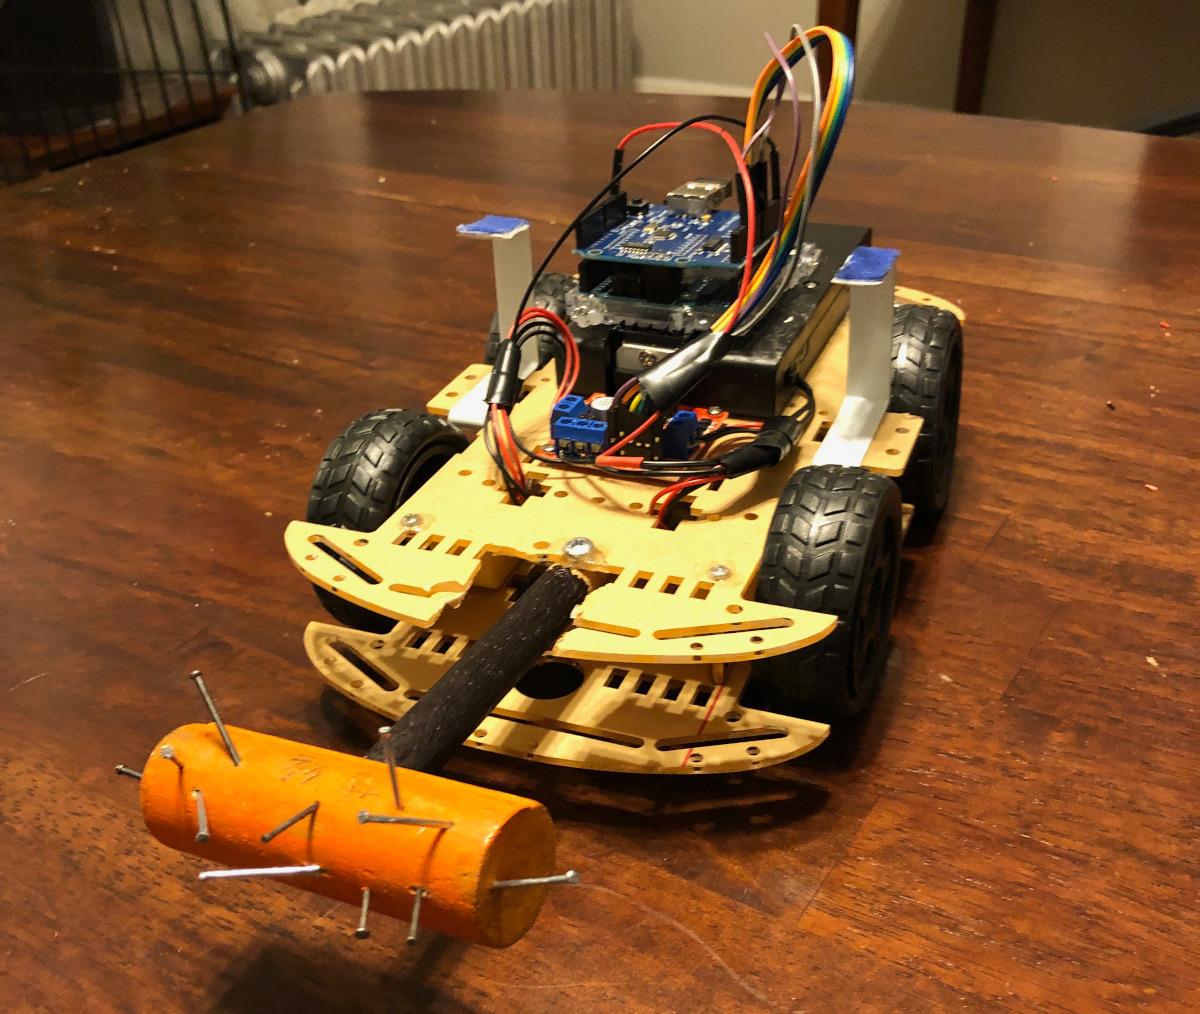
To control the robot, I chose to use a wireless PS3 controller that uses Bluetooth. For it to communicate with Arduino, the microcontroller, I needed to add a Host Shield. The Host Shield gave me a USB input. With the USB input, I could use a USB Bluetooth receiver. After pairing the USB Bluetooth receiver with the PS3 controller, using a PS3 Bluetooth Arduino library, I was then able to connect into the controls of the PS3.
For the body of the robot, I used some harder cardboard I found around the house, then attached it with Welder’s glue and some handy duck tape. After it was constructed, I outlined the windows with a black Sharpie then spray painted it a metallic color. Since the wheels were yellow originally, I also spray painted those black. You might also notice a mallet at the end of the robot (with the nails), that was also spray painted as well. The body also has LED lights, those were attached and uses 2 A23 alkaline batteries on the inside of the body to power the lights. The lights are controlled with a nickel push button switch. The schematics section below visually shows how everything was connected.
But for now The Revenge of the Cybertruck is ready for battle!
Electrical Material
- 1 Arduino Uno
- 1 Arduino USB Host Shield
- 1 Wireless USB Bluetooth Receiver Adapter
- 1 L298N Motor Driver
- 4 TT DC Gearbox Motors
- 1 8xAA 12V Battery Holder
- 8xAA Batteries
- 2 LED Light Strips (1 Blue, 1 Red)
- 2 A23 Batteries
- 2 A23 12V Battery Holders
- 1 Nickel Push Button Switch
Other Material
- Chassis
- 4 Wheels
- Cardboard for frame
- Wooden Mallet
- Nails
- Spray Paint
- Duck Tape
- Welder’s Glue
Schematics